July 13, 2026
·
11 min read
Set up a testimonial wall on Shopify
A step-by-step guide to setting up a testimonial wall on Shopify—choose the right build path (no-app vs app), structure testimonials with metaobjects, publish a filterable wall page, compare layout options, and maintain trust with strong UX and moderation workflows.


You’ve got great customer quotes—so why are they scattered across product pages, emails, and screenshots instead of working together to build trust?
A testimonial wall gives you one place to showcase proof, answer objections, and reinforce your brand story. This guide walks you through two reliable ways to build it on Shopify (no app or app-based), how to design it so it feels credible and fast, and how to keep it fresh with a simple moderation workflow.
Tooling Blueprint
Your testimonial wall only works if the plumbing is clean. Pick a build path, gather consistent assets, and confirm access before you touch the theme.
Choose build path
You’re choosing between native theme sections and an app because the trade-offs are real. Decide based on moderation needs, design control, and how fast you must ship.
| Decision factor | OS 2.0 sections | Testimonial app | Best when |
|---|---|---|---|
| Moderation workflow | Manual | Built-in tools | High volume reviews |
| Design control | Full theme control | App-dependent | Brand-critical layouts |
| Setup speed | Medium | Fast | Tight timelines |
| Data portability | In theme | Vendor export | Long-term ownership |
If you expect frequent updates, moderation usually forces the app route.
Prep assets
Testimonials break when inputs are inconsistent. Define a minimum dataset so every card renders cleanly.
- Customer name and initials fallback
- Photo or avatar permission
- Quote text with length cap
- Rating value and scale
- Product, permission proof, and source link
If you can’t prove permission, don’t publish it.
Access checklist
Lock this down before building, or you’ll stall mid-implementation. You need the right admin roles, plus access to any source system you plan to import from.
Confirm you have Shopify admin permissions to install apps, edit theme code, and publish changes. Verify theme editor access, the ability to edit your Policies or Pages, and logins for any review platform you’ll import from.
Access is the real critical path, not the layout.
Theme compatibility
Your theme determines how cleanly you can place a testimonial wall. Check OS 2.0 support and block compatibility now, before you commit to a tool.
Verify the theme uses Online Store 2.0 with JSON templates and supports app blocks on the templates you’ll edit. Note limitations like hard-coded sections, restricted page templates, or heavy styling that fights embed widgets.
If the theme resists blocks, you’re signing up for custom code work.
No-App Wall
You can build a testimonial wall without apps by using Shopify metaobjects, metafields, and a dedicated template. You get full control over layout, filters, and how testimonials connect to products.
Create metaobject
Create a metaobject definition first, because your wall needs a structured data model.
- In Shopify admin, go to Content → Metaobjects → Add definition.
- Name it Testimonial and set the type to something like
testimonial. - Add fields: Quote (multi-line text), Name (single line), Image (file).
- Add fields: Rating (number), Product (product reference), Source URL (URL).
- Add a Visible (boolean) field for publish control.
Design the schema like an API. Your theme will thank you later.
Add entries
Once the schema exists, you can enter testimonials like content blocks.
- Go to Content → Metaobjects → Testimonial → Add entry.
- Paste the quote, then standardize punctuation and line breaks.
- Upload the image, and use consistent crops when possible.
- Set Visible = true only for approved entries.
- Add the product reference and source URL when you have them.
If you can’t keep formatting consistent here, your wall will look “random” on purpose.
Build wall template
Create a dedicated page template so the wall is isolated from normal pages. Then add a section that queries your metaobject entries and renders a card grid in Liquid.
In the section, loop over entries, skip anything not visible, and output quote, name, image, rating, and optional links. Add sane fallbacks for missing images or ratings, because some entries will be incomplete.
Treat the wall like a mini CMS view, not a one-off page.
Add filters
Filters keep the wall useful when you have more than a handful of testimonials.
- Add a Product tag via product reference.
- Add a Collection tag via collection reference.
- Add a Use case tag as a single-line text field.
- Render filter links as query params or anchors.
- Show an All option that clears filters.
If you see users scrolling forever, you waited too long to add filters.
Publish page
Publishing is simple once the template exists.
- Go to Online Store → Pages → Add page.
- Set the theme template to your testimonial wall template.
- Add intro copy and SEO fields, but keep the page body minimal.
- Add the page to main navigation and the footer.
- Link it from product pages where the matching testimonials matter.
A wall that isn’t linked is just a private collection.
App-Based Wall
An app-based testimonial wall is the fastest way to publish credible social proof on Shopify. You get moderation, widgets, and structured data without rebuilding your theme.
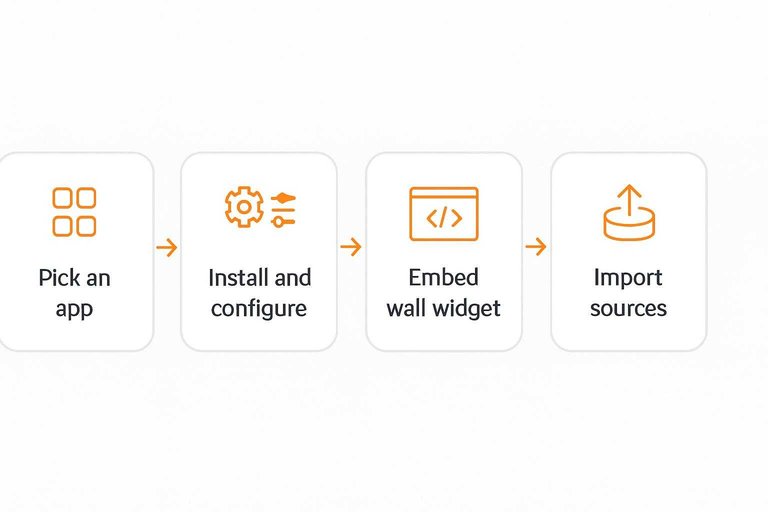
Pick an app
You’re choosing between full review platforms and testimonial-only tools. Pick for workflow first, then design.
- Import from CSV or other platforms
- Moderate before publishing
- Support theme app blocks
- Offer flexible display fields
- Provide spam and abuse controls
If the app can’t moderate well, your wall becomes a liability.
Install and configure
Install the app, then lock down what can show publicly.
- Turn on manual moderation for new submissions.
- Choose display fields like name, photo, location, and purchase.
- Pick a card style that matches your product pages.
- Set star rating rules and missing-rating behavior.
- Define identity rules for initials, full names, or anonymity.
Decide what “good enough to publish” means before requests start flowing.
Embed wall widget
Create a dedicated page, then embed the wall where Shopify can render it cleanly.
- Create a “Testimonials” page in Shopify.
- Assign a template that supports app blocks.
- Add the app’s wall block or widget to the template.
- Place it below a short intro and above any FAQ.
- Save, then test on mobile and desktop.
A wall works best as a destination page you can link everywhere—and if you need to paste a snippet into a custom section, refer to this embed code definition.
Brand styling
Most apps let you style cards, fonts, and buttons without code. Use that first, then use custom CSS only where the app supports it.
Match your theme’s font stack, border radius, and spacing scale. Keep contrast high and layouts boring. Boring ships.
Import sources
Imports save time, but they also import mistakes. Validate the data before you publish it.
- Pick a source like CSV, Google reviews, or your prior platform.
- Map fields like name, rating, body, date, and product.
- Import a small sample first.
- Check formatting, duplicates, and missing fields.
- Run the full import, then queue for moderation.
A clean sample import prevents a messy public wall. (For a concrete CSV workflow, see Loox’s guide on importing reviews from a spreadsheet.)
Automation rules
Automation keeps reviews coming in without constant manual work. Set requests carefully so you don’t annoy customers or attract spam.
Send requests after delivery, not purchase. Add friction for suspicious submissions. Default to “hold for review” unless trust is earned.
Wall Layout Options
Pick a layout that makes scanning easy and proof feel real. The wrong layout hides your best lines and looks manufactured.
Use this table to match layout style to readability and trust goals.
| Layout | Best for | Readability | Trust signal |
|---|---|---|---|
| Masonry grid | Mixed lengths | Medium | Feels organic |
| Uniform card grid | Quick scanning | High | Looks curated |
| Single-column list | Long stories | Highest | Feels detailed |
| Carousel slider | Tight pages | Low | Feels promotional |
Choose the layout that fits your strongest testimonial format, not your prettiest template. If you want a deeper look at how layout and structure influence credibility, see a customer testimonials landing page. If you’re using a tool like ShowTrust to collect and curate testimonials, it’s easier to match layout to what you actually have (short quotes vs. longer stories) because you can organize what’s approved and ready to display before you commit to a wall design.
Design and UX
A testimonial wall works when it feels like a real archive, not a marketing collage. Your job is to make each card readable, verifiable, and fast to scan.
Card anatomy
A consistent card structure makes the wall feel curated, not chaotic. It also prevents “one-off” formatting that quietly erodes trust.
- Quote text with consistent truncation
- Name plus photo or initials
- Rating with clear scale
- Product context or variant
- Date and source label
Set one expand pattern, then enforce it everywhere. That’s how you avoid accidental bias.
Trust cues
Add details that explain where the testimonial came from and what you’re allowed to show. Credibility often hinges on small, boring clarifications.
A simple “Shared with permission” note reduces skepticism. Use verification badges only when they’re strictly true. Link to the referenced product, and to your policy for review collection or order proof.
Trust isn’t a design style. It’s documentation.
Accessibility basics
Accessible cards are easier for everyone to read and navigate. You also avoid the common Shopify trap of pretty, unusable widgets.
- Write meaningful alt text, or mark decorative images as decorative.
- Ensure visible keyboard focus for cards, buttons, and filters.
- Meet contrast requirements for text, icons, and star ratings.
- Keep line length readable, especially inside expanded quotes.
- Avoid auto-rotating carousels; they break control and attention.
If keyboard users can’t browse it, you’re hiding your best proof. For more context, see this guidance to avoid auto-playing content.
Performance tuning
A testimonial wall can get heavy fast. Images, avatars, and scripts add up on mobile.
- Serve responsive images with appropriate sizes and modern formats.
- Lazy-load below-the-fold images and defer noncritical scripts.
- Limit initial render to a sensible set of cards.
- Add pagination before infinite scroll, unless browsing demands it.
- Preload only what’s immediately visible, not the whole wall.
Speed is a trust cue too. Slow pages feel like hype.
Mobile behavior
Mobile is where your wall either becomes a calm feed or a cramped mess. Design for thumbs first, then polish for desktop.
Use clear grid breakpoints so cards don’t shrink into illegibility. Keep tap targets generous for expand, filters, and product links. If you add filters, consider sticky behavior that doesn’t steal vertical space.
On mobile, scannability wins. Make the “more” action intentional.

Moderation Workflow
A testimonial wall stays trustworthy when it runs on a workflow, not vibes. Build a loop you can repeat, even when you swap themes, apps, or team members.
Collection channels
You want testimonials to arrive in consistent formats, with clear permission to publish. Otherwise you end up chasing details and hesitating at publish time.
- Post-purchase email with a short, guided prompt
- On-site form with product and order context
- Support tickets flagged for praise moments
- Explicit consent checkbox for public display
- Usage-rights field for photos and names
If consent is missing, treat the testimonial as private feedback, not marketing copy.
Approval checklist
A checklist keeps you compliant and consistent, even when multiple people publish. It also prevents “helpful edits” that turn into risky claims.
- Verify it’s a real customer, or label it unverified.
- Edit for clarity without changing the meaning.
- Remove prohibited claims and sensitive promises.
- Strip personal data not needed for credibility.
- Confirm photo permission and attribution details.
Your wall is a claim surface, so treat every approval like a mini-release.
Version control
Edits happen, and that’s fine, but you need traceability. Keep the original submission, log what changed, and note why.
Use one source of truth, like a spreadsheet or Airtable, with fields for: original text, approved text, consent status, asset links, and placements. Track every location it appears, including the wall, product pages, landing pages, and ads.
When someone asks, “Where else is this quote used?”, you should answer in seconds.
Refresh cadence
Stale testimonials don’t just underperform, they signal neglect. A light schedule keeps the wall current without constant tinkering.
- Rotate featured testimonials based on current bestsellers.
- Archive testimonials tied to discontinued products.
- Review the wall for relevance on a recurring calendar.
- Reconfirm permissions when expanding usage, like ads.
- Flag gaps, then trigger new collection campaigns.
Your best wall is never “done”; it’s maintained like inventory.
Launch your wall—and keep it credible
- Pick your build path: go no-app (metaobjects + theme templates) for control, or an app for faster setup and imports.
- Prep your assets: approved quotes, names, photos/logos, product/service tags, and permission notes.
- Publish a first version: start with a simple grid, add filters only if you have enough volume, and link the wall from your main navigation and key landing pages.
- Protect trust: enforce an approval checklist, keep sources and dates, and schedule a regular refresh so the wall stays current and believable.
Frequently Asked Questions
- Where should I link to my testimonial wall for ecommerce on a Shopify store?
- Link it from your main navigation and footer, and add contextual links near high-intent areas like product pages, cart, and checkout trust sections. A short “See more customer stories” link usually gets more clicks than a standalone “Testimonials” page buried in the menu.
- Should I put the testimonial wall on my homepage or keep it as a separate page?
- Most stores do both: feature a small curated section on the homepage and link to a dedicated testimonial wall for ecommerce for depth and browsing. This keeps the homepage fast while still giving shoppers a place to verify social proof.
- How do I track whether a testimonial wall is improving conversions on Shopify?
- Track clicks to the wall, time on page, and assisted conversions using GA4 (events + funnels) and Shopify analytics (conversion rate by traffic source/landing page). Also A/B test placements (homepage module vs product page link) to see which drives more downstream add-to-carts and checkouts.
- Can I use a testimonial wall for ecommerce without a reviews app like Judge.me or Yotpo?
- Yes—testimonials and product reviews are different: reviews are typically product-specific with ratings, while a testimonial wall is curated, brand-level social proof. You can run a wall using only customer quotes and attributes (name, product, photo) even if you don’t collect star ratings.
- What’s the easiest way to collect new testimonials and keep a Shopify testimonial wall updated?
- Use a shareable testimonial request form/link that feeds into an approval queue so you can publish only the best, most relevant quotes. A tool like ShowTrust fits well if you want collection + curation + an embeddable wall in one workflow without stitching multiple tools together.
Launch a High-Trust Testimonial Wall
Once you’ve picked your layout and moderation workflow, the next challenge is collecting fresh testimonials consistently without adding extra manual steps in Shopify.
ShowTrust makes it easy to request, approve, and curate testimonials, then publish them as an embeddable wall or public page that boosts conversions.
Written by
ShowTrust
Notes from the ShowTrust team on collecting testimonials and building authentic social proof.
Share: