July 4, 2026
·
9 min read
Set Up a Testimonial Approval System in One Hour
A one-hour guide to setting up a testimonial approval system that reduces back-and-forth and keeps you compliant—define the workflow, choose simple tools, build an intake form, draft a release/consent process, and run everything through an approval tracker and review checklist.
Testimonials are only “easy” until you need an approval, a headshot, a company title change, or a last-minute legal tweak. Without a system, you end up chasing people across email threads, losing context, and delaying publish dates.
This guide helps you build a lightweight approval flow in about an hour: clear roles and stages, a clean intake form, consent language you can reuse, and a tracker that makes status and next steps obvious. You’ll leave with a repeatable process your team and customers can actually follow.
Define the workflow
You need a workflow because “approved” is fuzzy by default. Fuzzy creates delays, awkward follow-ups, and inconsistent publishing.
Approval definition
Define “approved” so every reviewer makes the same call, even on a busy day. You want clear criteria that cover legal comfort, factual accuracy, and brand fit.
Approved means:
- Consent is explicit: written yes to publish in named channels.
- Claims are accurate: no inflated results, no unverifiable superlatives.
- Tone is on-brand: no sarcasm, no sensitive details, no unintended promises.
- Name and title rules are set: full name, first name only, or anonymized.
- Edits are bounded: you can fix grammar, not change meaning.
If you can’t point to a criterion, you’re not approving. You’re guessing.
System roles
Assign roles so requests don’t float between “someone” and “anyone.” Give every role a named backup.
- Requester: initiates ask, provides context
- Reviewer: checks accuracy, flags risks
- Approver: gives final publish permission
- Publisher: posts and formats everywhere
- Backup: covers absences, keeps queue moving
Ownership beats optimism. Your workflow runs when people are out.
Lifecycle stages
Map the full path so you always know what to do next. Each stage should have a clear owner and a clear “done” definition.
Use these stages:
- Requested: ask sent, channel logged
- Received: raw response captured
- Drafted: cleaned version prepared, edits tracked
- Sent to customer: approval request delivered with context
- Approved: explicit yes received, usage scope noted
- Published: posted, linked, and tagged
- Archived: source, consent, and final version stored
When you can name the stage, you can fix the bottleneck. Mystery is the real delay.
SLA and reminders
Set targets and reminders so reviews don’t die in inboxes.
- Set a review target for internal review and customer approval.
- Trigger the first reminder when the item sits in one stage too long.
- Trigger a second reminder to the backup owner, not the same person.
- Escalate to the approver when a publish-critical deadline is at risk.
- Close the loop by marking “no response” and archiving after a final follow-up.
Speed comes from defaults. Reminders are your silent project manager.
Pick your tools
You need a lightweight stack for intake, review, approval capture, and storage. Use tools you already have, and keep handoffs boring.
| Workflow part | Best default | If you need lighter | Notes |
|---|---|---|---|
| Intake | Form tool | Shared doc | One submission per quote |
| Review queue | Kanban board | Spreadsheet tab | One card per request |
| Approval capture | E-sign tool | Email reply | Save exact consent text |
| Storage | Shared drive folder | Notion page | Store source and approval |
Pick the simplest option that preserves proof of consent, then standardize it across your team. If you’re using Google tools, it helps to manage Google Forms responses so intake reliably lands in a tracker.
Create intake form
You need one form that works for approval and reuse later. Otherwise you’ll chase missing details every time you publish.
Build it once, then treat it like an internal API for testimonials. Clean inputs. Predictable outputs. Tools like ShowTrust can help here by standardizing collection and making sure submissions are consistently usable when you’re ready to publish.
Required fields
Capture the fields you’ll need for legal, publishing, and attribution. If it’s not in the form, it won’t exist when you need it.
- Testimonial quote
- Customer name
- Title and company
- Headshot permission
- Channel consent
Add contact email too, even if you already know them.
The win is future-proofing: one submission can power web, ads, and sales decks — especially if you’re collecting through a dedicated testimonial workflow (e.g., ShowTrust) that keeps consent and attribution tied to the quote.
Smart prompts
Good prompts pull out specifics without putting words in their mouth. You want context and outcomes, not marketing copy.
Use optional questions like:
- “What were you trying to achieve?”
- “What was happening before you used us?”
- “What changed after?”
- “Anything you’d tell a peer?”
Specifics make approvals faster and reuse easier across channels — and they’re easier to curate later when your testimonial tool lets you organize submissions by theme, outcome, or use case.
Submission routing
Route each submission to the right people, then create a review task automatically. Speed matters because approvals stall when humans must remember.
- Send a notification email to the approver inbox.
- CC the requester, so they can follow up.
- Post a ping to your team channel for visibility.
- Auto-create a task in your tracker with the response link.
- Attach uploaded files to the task when possible.
Once routing is automatic, approval becomes a queue, not a hunt. If your collection system already includes an approve/publish step (as in ShowTrust), this workflow can be even simpler because the “review task” is built into where the testimonial lives.
Upload handling
Uploads get messy fast without naming rules. Decide the convention now, while you still care.
Use a simple scheme like:
CustomerName_Company_YYYY-MM-Testimonial
Store headshots and logos in a single shared folder with the same naming. Keep the form response link in that folder’s notes.
When your sales team asks for “that headshot,” you’ll find it in seconds — and it’s even smoother if the testimonial system you use keeps the approved quote and its assets managed together for easy embedding and reuse. If you also want to speed up collection, use a consistent outreach template from a testimonial request email generator so your form link gets the right context every time.
Draft the release
You need a reusable release message you can send in minutes. It should capture explicit permission and document any edits without drama.
Write it once. Reuse it forever.
Approval email template
Use one copy-paste email so every approval looks the same. Consistency protects you when someone “doesn’t remember” approving.
- Subject: “Testimonial approval: please reply APPROVE or EDIT”.
- Paste the proposed quote and attribution exactly as you plan to publish.
- List intended uses: website, sales decks, email, social, case study.
- Ask for a reply in this format: “APPROVE” or “EDIT: [your changes]”.
- Close with one line: “Replying APPROVE confirms you grant permission to use this.”
If they can approve in one word, they will actually do it.
Consent language
Add a compact consent block under the quote. It should cover identity, anonymity, and media permissions.
Use wording like this:
“By replying APPROVE, you authorize [Company] to use this testimonial with:
- Name and title: [Full name, Title, Company]
- Or anonymous credit: ‘Verified customer’ (if you prefer)
- Optional media: permission to use your headshot and/or company logo (yes/no)
You can request edits by replying EDIT with your preferred wording.”
Clear options reduce back-and-forth and prevent accidental overreach. For more detail on consent criteria, see the ICO’s guide on what is valid consent.
Edit boundaries
Set boundaries so “light edits” never become meaning changes. You’re protecting them and you.
- Will change: spelling, grammar, punctuation.
- Will change: obvious clarity tweaks without meaning shifts.
- Won’t change: claims, numbers, or outcomes you didn’t say.
- Won’t change: tone to sound more extreme.
- Won’t add: endorsements of specific competitors.
If you need stronger marketing language, ask for it directly.
Record retention
Decide where approval proof lives before you start sending requests. One source of truth prevents a scavenger hunt later.
Store approvals in one of these places:
- Link to the email thread in your CRM note
- PDF export of the thread in a “Testimonial Approvals” folder
- Screenshot plus timestamp, attached to the contact record
Keep the approval record for as long as you use the testimonial, plus whatever your internal policy requires.
The easiest legal defense is being able to pull the approval in 30 seconds.
Build approval tracker
You need one place that tells the truth about every testimonial. Otherwise, approvals live in inboxes and you ship the loudest thread.
Use a simple tracker in Airtable, Notion, Sheets, or your CRM. One row per testimonial. No exceptions.
Tracker columns
Define the fields once, then force every request through them. The goal is zero guessing during publish week.
- Customer name
- Request date
- Status
- Owner
- Publish link
- Consent proof
- Last touched
- Next step
If a column is empty, you found the bottleneck.
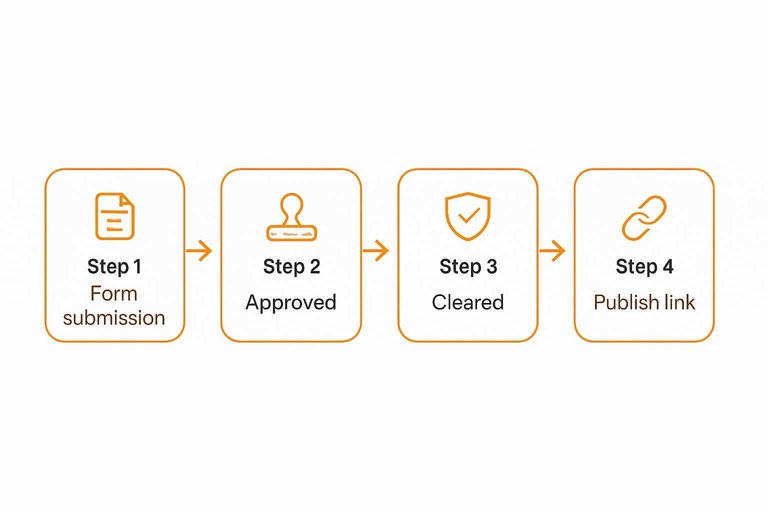
Status automation
Automate the boring moves so statuses stay current. You want the tracker to update itself when people do normal work.
- Form submission creates a new row.
- Customer approval flips Status to “Approved.”
- Internal review flips Status to “Cleared.”
- Publishing adds the URL to Publish link.
- Any edit updates Last touched.
If statuses don’t change automatically, people will “fix it later” forever.
Priority views
Views keep the team focused without sorting every time. Each view should answer one question in ten seconds.
Create three views:
- Needs customer: waiting on consent or edits
- Needs internal review: legal, brand, or leadership check
- Ready to publish: approved, cleared, missing only a slot
If you can’t name the next action from the view, the view is wrong.
Reminder cadence
Stalled testimonials die quietly. Add reminders that fire based on Status and Last touched.
- After 3–5 business days, ping the owner to follow up.
- One week later, escalate to the approver’s manager or project lead.
- After the second miss, switch the item to “Parked” with a reason.
- Review “Parked” items weekly for revive or close.
Your system should nag people so you don’t have to.
Standardize review checklist
You want approvals that are fast and safe, every single time.
A short, shared checklist prevents last-minute debates and quiet legal risk.
Use this table as your default review checklist (and keep testimonial question generator drafts attached when reviewing consent and compliance).
| Check area | What to verify | Common red flags | Fix fast |
|---|---|---|---|
| Accuracy | Names, roles, dates | Wrong title, typo | Confirm with source |
| Consent | Written permission | Missing release | Get approval email |
| Compliance | Claims, disclosures | Guarantees, medical claims | Remove or qualify |
| Brand voice | Tone, wording | Snarky, off-brand | Rewrite in-house |
| Privacy | Sensitive details | Personal data | Redact specifics |
If you can’t clear all four columns, don’t publish it yet.
Launch the System and Keep It Running
- Run a 10-minute dry test: Submit one sample testimonial, route it to the approver, and confirm the tracker updates, links work, and reminders fire.
- Publish the “one link” entry point: Share the intake form URL (and where to find it) so everyone submits through the same path.
- Start with a single SLA: Pick one default turnaround expectation and one reminder cadence, then adjust after your first few approvals.
- Review and refine monthly: Spot bottlenecks in the tracker, update the checklist based on common edits, and refresh templates so approvals stay fast and consistent.
Frequently Asked Questions
- Do I need a signed testimonial release, or is an emailed “yes” enough to approve and organize testimonials?
- An emailed “yes” is usually sufficient if it clearly grants permission to publish the testimonial, identifies where it can be used (website, ads, email), and notes any edits. Keep the message archived with the testimonial record so approval is easy to prove later.
- How do I approve and organize testimonials if I’m getting them from multiple places like email, reviews, and DMs?
- Route everything into one centralized repository and store the original source link/screenshot plus a cleaned, publish-ready version alongside the approval record. Use consistent tags (product, persona, use case, channel) so you can find the right quote quickly for any campaign.
- Should I edit customer testimonials for grammar, and how do I document edits during approval?
- Yes—light edits for clarity are usually fine as long as you don’t change meaning, claims, or numbers. Send the edited version back to the customer for explicit approval and keep both the original and final text attached to the same record.
- How can I measure whether my approved testimonials are actually improving conversions?
- Track testimonial placements as variants (A/B tests where possible) or as annotated changes, then monitor conversion rate, click-through rate, and assisted conversions in tools like GA4 and your A/B testing platform. Also compare performance by page type and testimonial theme to learn what resonates.
- Is there a tool that helps me approve and organize testimonials and then publish them on my website without extra steps?
- Yes—tools like ShowTrust can handle collection, approval/curation, and embeddable widgets so your approved testimonials can go live in one workflow. Look for features like approval status, tagging, and easy embed options to keep publishing consistent.
Turn Testimonials Into Trust
A one-hour approval system only works if collection, releases, and organization stay consistent as new customer feedback comes in.
ShowTrust helps you collect testimonials via a shareable form, approve and organize them in one place, then showcase them with embeddable widgets and a public wall to boost conversions.
Written by
ShowTrust
Notes from the ShowTrust team on collecting testimonials and building authentic social proof.
Share: