August 24, 2026
·
7 min read
What Is a Shopify Testimonial Widget and How Does It Work for Beginners?
A beginner-friendly explainer to Shopify testimonial widgets—what they are, why they matter for trust, how collection-to-display workflows work, the main widget types, and a safe setup/app-selection checklist.


Not sure whether a “testimonial widget” is just a pretty slider or something your Shopify store actually needs? If you’ve ever worried that shoppers don’t trust a new brand, you’re already thinking about the real job testimonials do.
This explainer breaks down what a Shopify testimonial widget is, where it typically appears, and the simple system behind it: collecting quotes, getting consent, moderating, storing, and displaying them without slowing your site. You’ll also learn the common widget formats and how to pick an app without surprises.
Big Picture First
A Shopify testimonial widget is a small block on your store that displays customer feedback where shoppers can see it. It usually shows short quotes, star ratings, photos, or names to make your store feel real and credible. Think of it as “social proof on the page,” not a pop-up or an ad.
What it is
A testimonial widget is an on-page display that shows feedback from real customers. It can include a quote, a star rating, a photo, or a name, depending on what you collect.
It sits inside your theme like any other section or app block. Shoppers read it while they browse.
Trust is the job.
Why it matters
Beginners use testimonials to remove doubts before they become bounces.
- Reduce “will this work for me?” anxiety
- Answer “is this store legit?” fast
- Add proof without sounding salesy
- Highlight outcomes in customers’ words
- Support claims you make elsewhere
If your product is unfamiliar, proof beats persuasion.
The mental model
Hold one simple pipeline in your head: input goes in, formatted proof comes out. You either collect testimonials manually, import them, or pull them from reviews, then decide what’s allowed to show.
After approval, you pick a layout and place it on a page. The widget renders that content for visitors, and they use it to decide if they trust you.
Once you see it as a pipeline, troubleshooting gets boring and easy.
Where it shows up
Placement is about catching doubt at the moment it appears.
- Homepage sections near key products
- Product pages near the buy button
- Cart page to reduce second thoughts
- Checkout, if your plan allows it
- Landing pages for paid traffic
- Post-purchase thank-you page
Put it where hesitation lives, not where it’s convenient.
How It Works
A Shopify testimonial widget is a small system: it collects statements, stores them, then renders them on your storefront. Follow the data path once, and the “magic” becomes predictable — and tools like ShowTrust simply package that path into a cleaner workflow so you can collect, curate, and publish social proof without reinventing each step.
Collection sources
Testimonials enter your system from a few common channels, depending on your workflow and tools. If you’re using a dedicated collection flow (for example, a shareable request link/form like ShowTrust provides), you can reduce the number of one-off sources you have to clean up later.
- Manually typed into an admin form
- Requested via post-purchase email
- Pulled from a review app
- Imported from CSV or another platform
- Captured from social posts or onsite forms
If you can standardize sources early, everything downstream gets cleaner.
Moderation and consent
Before anything shows on your site, most setups run an approval step. You confirm the wording, verify the customer, and decide what identity details you can display. A simple “approve & organize” queue (common in tools built for testimonial management) helps keep this consistent as volume grows.
Consent is the other gate. You need permission for names, photos, and any reused social content, and you should strip sensitive details or risky claims.
Treat moderation like product QA, not marketing polish. For a compliance baseline, review the FTC’s guidance on endorsements, influencers, and reviews.
Storage and syncing
Testimonials have to live somewhere, and that “somewhere” determines how portable they are. Many widgets store them inside the app, some write to Shopify metafields, and others keep them in the app’s own database — which can be fine if you also get an easy way to manage, curate, and publish them as needed (for instance, via an embeddable widget and a public testimonials page).
When you edit a testimonial, the widget syncs the change to the storefront by re-fetching data, updating cached content, or rebuilding a block section.
Pick storage based on ownership, not convenience, because switching later is painful.
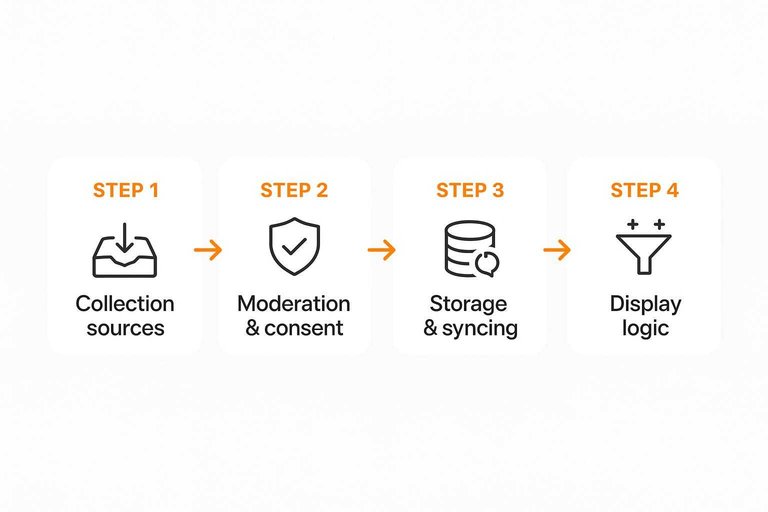
Display logic
The widget needs rules to decide what to show and when — especially if you’re trying to turn feedback into quick, verifiable trust signals instead of a cluttered feed.
- Select testimonials by product, collection, or global pool.
- Filter by status, rating, or tags.
- Order by newest, featured, or randomized.
- Rotate items on a timer or per page view.
- Aggregate star ratings when enabled.
If the rules are unclear, your widget will look “random” in the bad way.
Performance basics
Most widgets add scripts, and scripts compete with your theme for load time. The fastest widgets load later, compress images, and avoid heavy animations — and it’s worth checking whether your testimonial tool keeps embeds lightweight, since social validation signals only help if it doesn’t slow the page that’s trying to convert.
Too many sliders, carousels, and badge strips on one page can stack up into real lag, especially on mobile.
Performance is UX, and UX is conversion.
Widget Types
Different testimonial widget formats change two things fast: setup effort and where they fit on your store.
Pick the simplest format that matches your page and your goal.
Here’s a quick comparison of common formats beginners use.
| Widget type | Best placement | Beginner setup | Use when |
|---|---|---|---|
| Static grid | Product, home | Easiest | You want quick proof |
| Carousel slider | Home, landing | Easy | You have many reviews |
| Popup modal | Product, cart | Medium | You want focus |
| Sidebar badge | All pages | Easy | You want constant trust |
| Video testimonial | Landing, product | Harder | You need strong conviction |
Start with a static grid or badge, then upgrade only after you know what’s missing.
Safe First Setup
Add a testimonial widget in a way that keeps your theme stable and your store trustworthy.
- Duplicate your theme in Shopify before adding anything.
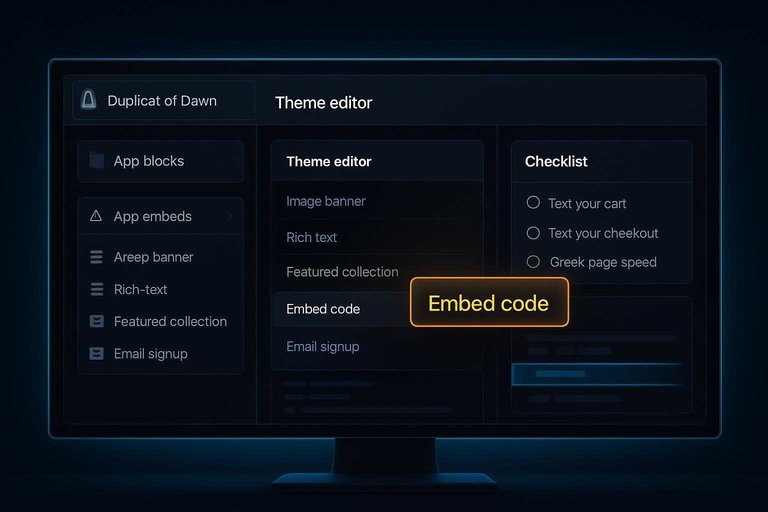
- Add the widget using Shopify app blocks or theme sections first.
- Place it on one page and preview on mobile and desktop.
- Keep spacing and fonts consistent with your theme settings.
- Publish only after testing cart, checkout, and page speed basics.
If the widget needs custom code, stop and use a duplicate theme first—especially if you’re pasting embed code into your theme. Shopify’s guide to extend your theme with apps explains the safer path using app blocks and app embeds.
Choosing an App
Pick a testimonial widget app like you’d pick infrastructure, not decoration. You want the smallest tool that meets your needs, with the lowest long-term risk. Imagine swapping themes later or migrating platforms; your reviews should come with you.
Must-have features
Start with the basics that keep you shipping, not fiddling with settings.
- Import from CSV or copy-paste
- Moderate before publishing
- Switch layouts per section
- Stay fast on mobile
- Offer basic colors and fonts
- Target pages or products
If an app misses two of these, you’ll feel it every week.
Nice-to-have features
Add these only when they match how you sell, or you’ll buy complexity.
- Support video testimonials
- Collect photo reviews
- Pull UGC from social
- Add Google-rich snippets
- Show multiple languages
- Automate review requests
- Connect to email tools
Nice-to-haves are leverage, but only after the foundation holds.
Risk checks
Do a quick risk pass before you install anything. Apps can touch your theme, your customer data, and your store speed.
Check these items:
- Permissions: only what the feature requires.
- Data portability: export reviews anytime.
- Theme impact: minimal code, no hard lock-in.
- Support quality: clear docs, recent updates.
- Uninstall cleanliness: removes snippets and files.
If the exit is messy, the app owns you later.
Decision shortcut
Use this to pick the simplest app that matches your store’s review reality.
| If you need | Choose | Why it fits |
|---|---|---|
| Simple quotes | Lightweight testimonials | Minimal setup |
| Product reviews | Full review app | Ratings plus filtering |
| UGC-heavy store | UGC + reviews tool | Social proof at scale |
Match the tool to the proof you actually have, then upgrade only when you outgrow it.
Set It Up Once, Then Improve It on Purpose
- Start with one placement (homepage or product page) and 6–12 high-quality testimonials with clear names/contexts.
- Confirm consent and moderation rules before you publish anything, especially if you’re pulling from emails, DMs, or reviews.
- Keep it fast: limit heavy sliders, compress images/avatars, and test on mobile after installation.
- Revisit your choice after a week: if editing, filtering, and styling are painful—or performance dips—switch to an app with stronger controls and lighter loading.
Frequently Asked Questions
- Can I add a testimonial widget for Shopify without using an app?
- Yes. You can build a simple testimonials section with Shopify theme sections/blocks (or custom Liquid), but you’ll miss app features like submission forms, approvals, and reusable widgets across pages.
- How do I make sure my Shopify testimonial widget doesn’t slow down my store?
- Keep the widget lightweight: limit how many testimonials render on initial load, avoid auto-playing sliders, compress images, and check impact in Chrome DevTools Lighthouse or Shopify’s Online Store speed report.
- How do I measure whether a testimonial widget for Shopify is actually helping conversions?
- Track a baseline conversion rate, then measure changes after adding the widget using Shopify Analytics and event tracking (GA4 or Shopify Pixels) for clicks/scroll depth near the testimonial section.
- Should I put a testimonial widget on every Shopify page or only key pages?
- Put it where it reduces purchase anxiety: product pages, cart, and high-traffic landing pages usually benefit most, while blog posts and low-intent pages often don’t need it.
- What’s the easiest way to collect testimonials and publish them to a Shopify widget?
- Use a tool that handles collection, approval, and embedding so you’re not copy-pasting reviews—ShowTrust is one option if you want a simple request link/form plus embeddable testimonial widgets.
Turn Reviews Into Conversions
After you understand how a Shopify testimonial widget works, the real win is collecting credible testimonials and publishing them consistently without extra manual effort.
ShowTrust helps you request, approve, and embed testimonials with clean widgets and a public wall—so shoppers see proof they can trust at every step.
Written by
ShowTrust
Notes from the ShowTrust team on collecting testimonials and building authentic social proof.
Share: